Plotting particles with vtk.js
Introduction
In the previous articles in this series we talked about:
- Part 1: Reading VTK format particles with Javascript in a browser
- Part 2: Saving the read-in particle data in a Vuex store
- Part 3: Initialization of a store and the user interface.
- Part 4: Setting up the Three.js renderer
- Part 5: Setting up the Three.js scene and camera
- Part 6: Creating and plotting Three.js ellipsoids
Let us now explore the vtk.js library to see if the process of displaying particles can be simplified given that we are using VTK format input files.
Registering VTK components
As discussed in Part 3, we first need to register components that are specific to VTK. In our case, we need
var VtkRenderer = require("./graphics/VtkRenderer.vue").default;
var VtkEllipsoidParticles = require("./graphics/VtkEllipsoidParticles.vue").default;
Vue.component('vtk-renderer', VtkRenderer);
Vue.component('vtk-ellipsoid-particles', VtkEllipsoidParticles);
Creating Vuex stores for VTK data
Once again, we repeat the process discussed in
Part 3. We have discussed
the Store in Part3, and in this case we create the files
VTKGraphicsModule.ts- similar toThreeGraphicsModule.tsVTKGraphicsState.ts- see belowVTKGraphicsGetters.ts- similar to the getters for the three.js Vuex storeVTKGraphicsMutations.ts- see belowVTKGraphicsActions.ts- similar to what we have seen before
The VTKGraphicsState.ts file now contains a list of actors, sources, and mappers. There is also
a flag indicating that VTK actors have been created:
export class VTKGraphicsState {
  actors     : any [];
  sources    : any [];
  mappers    : any [];
  areVTKActorsCreated  : boolean;
  constructor() {
    this.actors  = [];
    this.sources = [];
    this.mappers = [];
    this.areVTKActorsCreated = false;
  }
};
The VTKGraphicsMutations.ts file contains the following:
import {Mutation, MutationTree} from 'vuex';
import {VTKGraphicsState} from './VTKGraphicsState';
export function ADD_VTK_ACTOR(state: VTKGraphicsState, actor: any) {
  state.actors.push(actor);
}
export function ADD_VTK_SOURCE(state: VTKGraphicsState, source: any) {
  state.sources.push(source);
}
export function ADD_VTK_MAPPER(state: VTKGraphicsState, mapper: any) {
  state.mappers.push(mapper);
}
export function VTK_ACTORS_CREATED(state: VTKGraphicsState, value: boolean) {
  state.areVTKActorsCreated = value;
}
export default <MutationTree<VTKGraphicsState>> {
  ADD_VTK_ACTOR,
  ADD_VTK_SOURCE,
  ADD_VTK_MAPPER,
  VTK_ACTORS_CREATED
}
The VTK graphics panel
The VTK graphics panel is simpler in this case.
<template>
  <div id='vtk-graphics-container'>
    <div class="uk-card uk-card-default uk-card-large">
      <div class="uk-card-body">
        <vtk-renderer v-bind:size="size">
          <vtk-ellipsoid-particles> </vtk-ellipsoid-particles>
        </vtk-renderer>
      </div>
    </div>
  </div>
</template>
<script src="./VtkGraphicsPanel.ts"> </script>
The graphics panel template is simpler mainly because each actor is associated with a single mapper and a single source in our implementation. Better options will, one hopes, become available after vtk.js reaches version 1.
The VTK renderer
We use a named slot for the template in the file VtkRenderer.vue:
<template>
  <div>
    <slot name="vtk">
    <div ref="vtk-graphics-container"></div>
    <slot>
  </div>
</template>
<script src="./VtkRenderer.ts"> </script>
The code for the renderer is slight more complicated in this case and we add
an interactor to interact with the plot. The VtkRenderer.ts code is listed below.
import * as Vue from "vue";
import { Component, Lifecycle, Watch, Prop, p } from 'av-ts';
import Store from './Store';
import * as vtkRenderWindow           from 'vtk.js/Sources/Rendering/Core/RenderWindow';
import * as vtkRenderer               from 'vtk.js/Sources/Rendering/Core/Renderer';
import * as vtkOpenGLRenderWindow     from 'vtk.js/Sources/Rendering/OpenGL/RenderWindow';
import * as vtkRenderWindowInteractor from 'vtk.js/Sources/Rendering/Core/RenderWindowInteractor';
import * as vtkTexture                from 'vtk.js/Sources/Rendering/Core/Texture';
@Component({
  name: 'VtkRenderer'
})
export default class VtkRenderer extends Vue {
  @Prop
  size = p({
    type: Object, // { w, h }
    required: true
  });
  @Prop
  renderWindow = p({
    type: vtkRenderWindow
  });
  @Prop
  renderer = p({
    type: vtkRenderer
  });
  @Prop
  openGLRenderWindow = p({
    type: vtkOpenGLRenderWindow
  });
  @Prop
  interactor = p({
    type: vtkRenderWindowInteractor
  });
  private _renderWindow: any;
  private _renderer: any;
  private _openGLRenderWindow: any;
  private _interactor: any;
  @Lifecycle
  created() {
    this._renderWindow = this.renderWindow;
    this._renderer = this.renderer;
    this._openGLRenderWindow = this.openGLRenderWindow;
    this._interactor = this.interactor;
    // Create VTK render window and renderer
    this._renderWindow = vtkRenderWindow.newInstance();
    this._renderer = vtkRenderer.newInstance();
    this._renderWindow.addRenderer(this._renderer);
    this._renderer.setBackground(0.32, 0.34, 0.43);
    // Create OpenGL renderwindow
    this._openGLRenderWindow = vtkOpenGLRenderWindow.newInstance();
    this._renderWindow.addView(this._openGLRenderWindow);
    // Create interactor
    this._interactor = vtkRenderWindowInteractor.newInstance();
    // Add watch to check for data updates
    var self = this;
    Store.watch(
      function() { return Store.getters.areVTKActorsCreated; },
      function() {
        if (Store.getters.areVTKActorsCreated) {
          self.addActors();
          self._renderer.resetCamera();
          self._renderWindow.render();
        }
      }
    );
  }
  @Lifecycle
  mounted() {
    if ((this.$refs)["vtk-graphics-container"]) {
      let el  = (this.$refs)["vtk-graphics-container"];
      this._openGLRenderWindow.setContainer(el);
      // Set the size of the window
      let w = (<any>this.size).w;
      let h = (<any>this.size).h;
      this._openGLRenderWindow.setSize(w, h);
      // Add the actors from the store
      this.addActors();
      // Interactor
      this._interactor.setView(this._openGLRenderWindow);
      this._interactor.initialize();
      this._interactor.bindEvents(el);
      this._renderWindow.render();
    }
  }
  // Get actors from the store and add to the scene
  private addActors() {
    var self = this;
    let actors  = Store.getters.actors;
    actors.map(function(actor : any, index : number){
      self._renderer.addActor(actor);
    });
  }
}
The procedure used in this code is identical to that explained in the standard book on VTK. You will be able to access that book here.
The interactor allows only rotation and pan. For zoom capabilities, you will need to you a more capable interactor from the vtk.js library.
The VTK particles component
To draw the particles, we use the following code
import * as Vue from "vue";
import {Data, Component, Lifecycle, Watch, Prop, p } from 'av-ts';
import * as vtkActor        from 'vtk.js/Sources/Rendering/Core/Actor';
import * as vtkSphereSource from 'vtk.js/Sources/Filters/Sources/SphereSource';
import * as vtkMapper       from 'vtk.js/Sources/Rendering/Core/Mapper';
import Store from "./Store";
@Component({
  name: 'VtkEllipsoidParticles'
})
export default class VtkEllipsoidParticles extends Vue {
  @Lifecycle
  public created() {
    var self = this;
    Store.watch(function() {
                  return Store.getters.isParticleReadComplete;
                },
                function() {
                  if (Store.getters.isParticleReadComplete)
                    self.createVTKParticles();
                });
  }
  private createVTKParticles() {
    // See below
  }
This part of the code is identical to that used for the three.js particles.
Creating the particles
The particle axis data are in the form of angles between the ellipsoid axes and the world coordinate axes.
These are converted directly into the appropriate rotation matrix. Sphere objects are then created at
the origin, rotated, scaled, and translated to their actual positions. The sphere objects are then
transformed into SphereBufferGeometry objects to make their manipulation slightly more efficient.
Finally, a “material” shading model is added to make sure that the image displayed isn’t flat and
a triangulated mesh is generated for each object.
  private createVTKParticles() {
    // Get the particle data
    let particles = Store.getters.particleData;
    // Extract the radius and center
    let radii = particles["Radius"];
    let centers = particles["Position"];
    // Loop through particles
    radii.map(function(radius : any, index : number){
      // Create the _mapper
      const mapper = vtkMapper.newInstance();
      // Create the actor
      const actor = vtkActor.newInstance();
      actor.getProperty().setEdgeVisibility(true);
      actor.getProperty().setEdgeColor(1.0, 0.5, 0.5);
      // Create the source
      const sphere = vtkSphereSource.newInstance();
      sphere.setPhiResolution(10);
      sphere.setThetaResolution(10);
      // Get the radius ratios
      let ratio = [1.0, radius[1]/radius[0], radius[2]/radius[0]];
      sphere.setRadius(radius[0]);
      let center = centers[index];
      sphere.setCenter(center[0], center[1], center[2]);
      // Set up the connections
      mapper.setInputConnection(sphere.getOutputPort());
      actor.setMapper(mapper);
      // Save the data
      Store.commit('ADD_VTK_ACTOR',  actor);
      Store.commit('ADD_VTK_SOURCE', sphere);
      Store.commit('ADD_VTK_MAPPER', mapper);
    });
    Store.commit('VTK_ACTORS_CREATED', true);
  }
Note that we did not rotate or scale the particles. To do that you will have to write your own code or wait until a more full-featured version of VTK is implemented by vtk.js.
Remarks
I ran into several issues while trying to use vtk.js. The main ones were:
- The
vtk.jslibrary needs to be transpiled usingbabelto avoid complaints aboutimportstatements in thewebpackbundle. - All events are captured by the interactors used by
vtk.jsand it is difficult to use Vue’s event handling capabilities with this library. - Geometry transformations have not been implemented in
vtk.jsyet. - Unstructured grid VTK XML files cannot yet be read in by
vtk.jsreaders. - The rendering process was much slower than that of
three.js.
The main advantages of vtk.js were:
- The familiar architecture and API which is similar to what we have done in scientific visualization for more than 20 years.
- The easy application of interactors (which was not the case with Typescript, Vue, and three.js, and an interactor had to be written). We will discuss the three.js interactor in a future article.
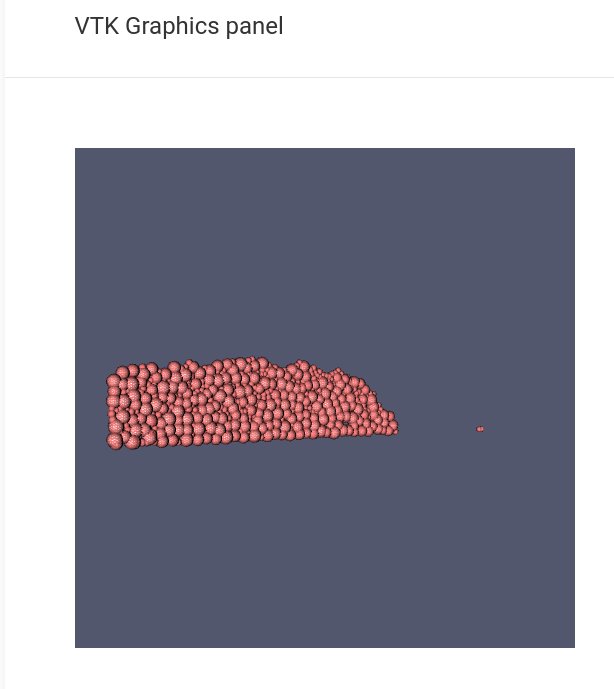
A plot of the spheres produced by our code can be seen below.